Author: Chad Boothe
Date: 11/10/2024
Background
Prior to the pandemic our school had desktop computers in the Computer Science classrooms and we had two Integrated Development Enviroments (IDEs) installed
- Eclipse: This is a very robust IDE that supported multiple languages to include our primary language taught, which is Java. However, I found that Eclipse has too many bells and whistles for students just learning programming. Also, students who needed to work on their code at home or vice versa would have to find a way to transfer their code. Our district uses Google Drive nowadays, but I often heard the story that students couldn't work on their code, because is was on another computer.
- BlueJ: This is a bare bones Java IDE. I really liked this IDE as students could focus on applying programming concepts without trying how to learn how to use the software. Also, BlueJ is a standalone application and students who needed to work on their code at home or vice versa would have to find a way to transfer their code. Our district uses Google Drive nowadays, but I often heard the story that students couldn't work on their code, because is was on another computer.
- Replit: The school year the pandemic started I was looking for an online IDE that would provide me a way to autograde students programs. At the time most of my students were using BlueJ and to grade assignments I would have to download each students program, open it up, and run it. I really wanted an autograder and after much searching I came across Replit. Replit is an online IDE that had a classroom enviroment that had a autograder option and allowed me to see a students code in realtime from my computer. Fast forward to the pandemic and Replit made virtual learning possible. I continued using Replit even after we were in-person, but they then got rid of the classroom enviroment.
Github Classroom

Per the GitHub website: Github is a developer platform that allows developers to create, store, manage and share their code. Github Classroom is a part of Github and allows teachers to create assignments and autograding for each assignment. The best part of Github Classroom is that it has an online IDE called Codespace. Students who only have a Chromebook can use the online IDE or students can use a standalone IDE (such as Eclipse). Regardless of the enviroment where students code, once they have completed an assignment they then Commit and Sync their code to the Github repository. As a teacher I have access to a students code submitted to the assignment in Github and I can quickly see an overview of the tests passed by a student.

Github Education
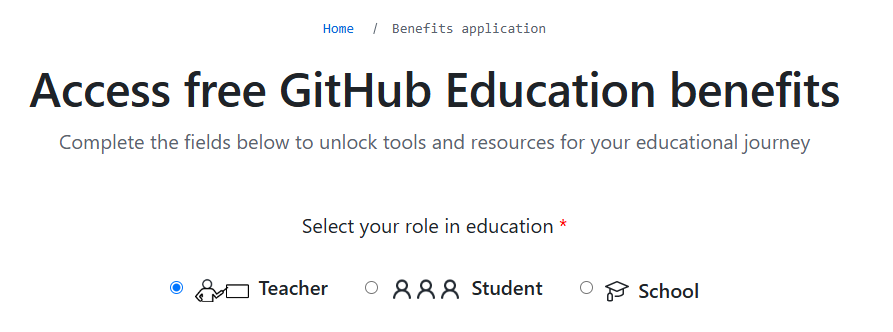
See the Github Education site to begin the process to get access to a lot of free resources on Github.
Create an Organization
Rather than using your personal Github account it is recommended your school create an organization. Per the Github site "The purpose of a GitHub organization is to allow multiple people to collaborate on projects, manage access to resources, and share resources like repositories and packages.".
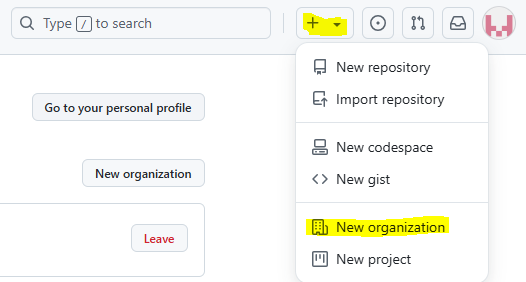
- Click the + sign from the right-hand side of the Github site and select New organziation.
- MORE TO COME
Repository Creation in Github
NOTE: You can also perform these steps from an IDE such as InteliJ, Eclipse, etc. However, in this article I wanted to keep it simple it just focus on using Github and Github Classroom.
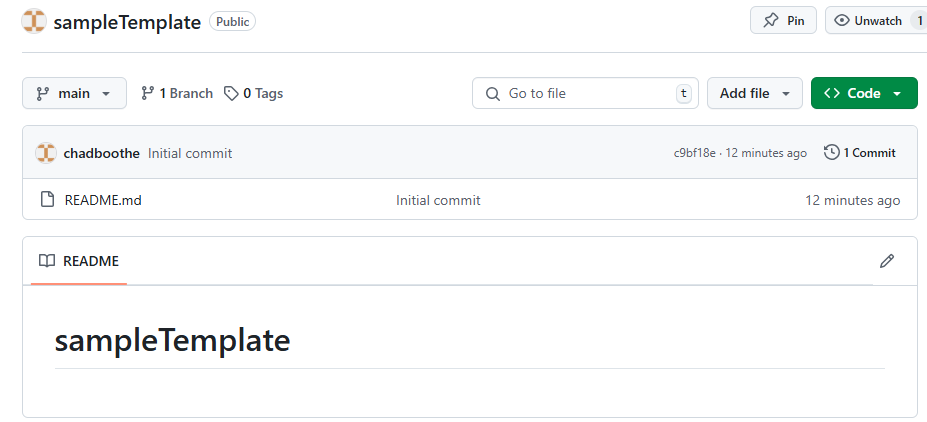
After logging into your Github account, follow these steps to create a blank repository. A repository is required to create the assignment in Github Classroom. When creating a repository you have two options:
- Create a generic template respository that you use for all your assignments. I use this option for when my tests are tied to an output vs. a function / method. For my intro level classes I don't get to functions until several months into the class. All my tests for the first months are just tied to expected outputs that are setup in Github Classroom.
- Create a respository for each assignment. I use this option when I want to place function / method tests for the students to run their code against. As mentioned above for my intro level classes I do not get to functions / methods for several months. For my advanced classes I create a new repository for each assignment.
- Click on the Repositories tab

- Click the
 button
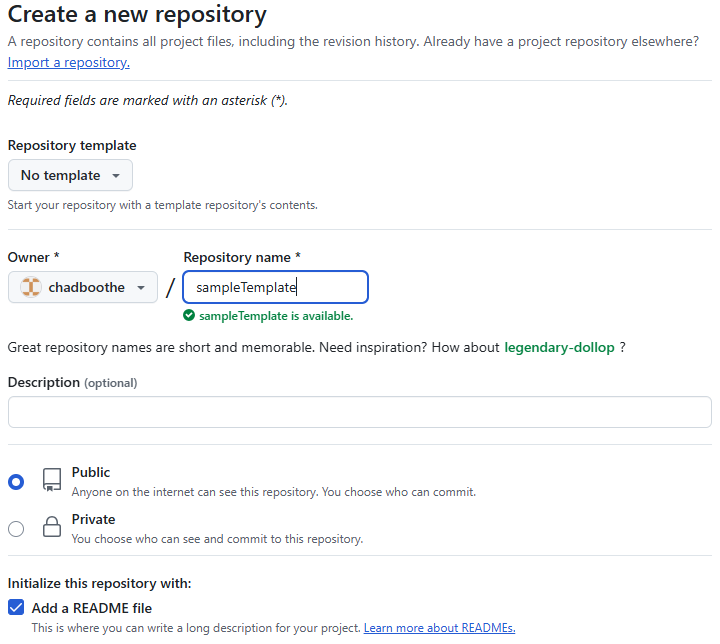
 - The following are the mininum fields that need to be filled out:
- Repository name: With this name you can either create a generic template name (ex. pythonTemplate) that you will use for all assignments or you can call this the assignment name (U1EX1_Poem).
- Public: Leave this checked as you need the respository public so it can be seen.
- Add a README file: This will add your first file to your respository.
- Click the
 button.
Transfer Repository
If the repository was created under your own repository it is recommended to transfer the template to your organiation.
- Click the Settings
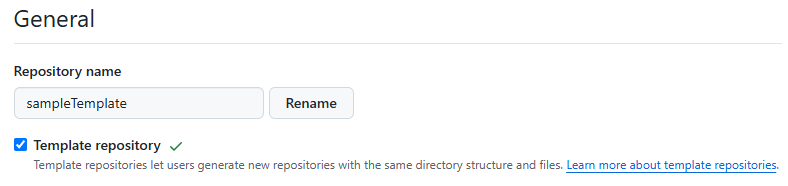
- Check the box for Template repository
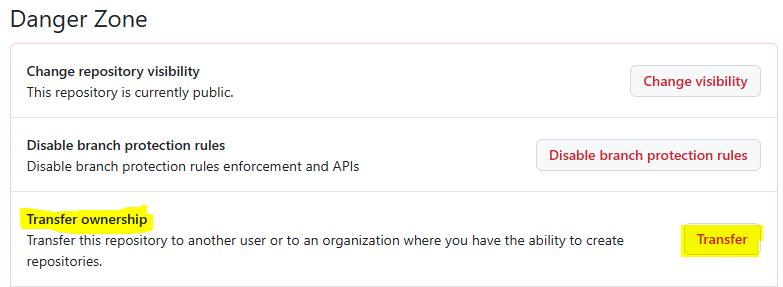
- At the bottom of settings under the Danger Zone section click the Transfer button.
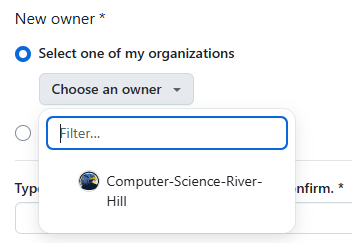
- Select the new owner from the drop-down list.
- Type the message requested and click I understand, transfer this repository
- The next step is to setup the tests in Github Education.